
944 S2 Repair
Moderator: Moderators
-
pauly
- Posts: 1892
- Joined: Sun Feb 24, 2008 7:16 pm
- TIPEC membership: 0
- Location: UK
Re: 944 S2 Repair
I'd wrap the discharge pipe, and the AOS. Not unheard of for it to melt with single skin downpipes.
-
sgl1966
- Posts: 533
- Joined: Wed Apr 18, 2012 8:26 am
- TIPEC membership: 0
Re: 944 S2 Repair
Unfortunatly been busy with work but hope to find more time soon . Vems looks like a very nice bit of kit with great support from Peep with all the little niggles you get . One issue I had which took a while to figure out was an arcing issue when trying to start the car causing the ecu to reset itself so unable to start . Like all good electrical problems this was intermittent . Found the cause to be that it was arcing from the cop to the cam cover . The rubber gasket is stopping a good earth with the cam cover . For the moment have just run a temporary earth which allows the car to start and run .
While trying to rectify this problem over a few weeks ,the rebuilt starter motor started complaining so have purchased a high torque motor from the states . Hopefully this will help turning over this larger capacity higher compression engine (9.5:1) .
And as for deja vu , here's a couple of pics of the next block with engine liners fitted . Gone for stepped liners this time . The pistons are some Arias 105mm 968 one's I have had machined down for an 8.5:1 cr as will be using a 2.7 head.
- Attachments
-
- IMG_1090-640x480.JPG (44.32 KiB) Viewed 17086 times
-
- IMG_1091-640x480.JPG (43.83 KiB) Viewed 17086 times
-
- IMG_1092-640x480.JPG (35.48 KiB) Viewed 17086 times
-
- IMG_1093-640x480.JPG (36.28 KiB) Viewed 17086 times
-
- IMG_1094-640x480.JPG (36.53 KiB) Viewed 17086 times
-
scam75
- Posts: 1244
- Joined: Wed Aug 19, 2009 1:44 pm
- TIPEC membership: 0
- Location: Glasgow
Re: 944 S2 Repair
Nice work Simon.
'90 944 Turbo - Sunroof delete, Factory bridge spoiler, CS wheels, CS steering wheel, 1st MY90 turbo in UK
Promax L2 chips, SciVision MAF, Lindsey DPW, MBC, Forge recirc valve, 3 bar FPR, K&N panel, GAZ Gold, wideband AFR, Sytec Motorsport Fuel Pump.
Promax L2 chips, SciVision MAF, Lindsey DPW, MBC, Forge recirc valve, 3 bar FPR, K&N panel, GAZ Gold, wideband AFR, Sytec Motorsport Fuel Pump.
-
Gryphon
- Posts: 220
- Joined: Sat Dec 26, 2015 7:20 pm
- TIPEC membership: 0
- Location: West Midlands
Re: 944 S2 Repair
This is such an awesome thread hiding behind a really unassuming title. Excellent work here 
'85 Black 944 Lux (Square Dash, Sunroof Delete)
'97 Mazda MX5 3.0 V6 swap
'09 Mazda 3 Sport
'97 Mazda MX5 3.0 V6 swap
'09 Mazda 3 Sport
-
sgl1966
- Posts: 533
- Joined: Wed Apr 18, 2012 8:26 am
- TIPEC membership: 0
Re: 944 S2 Repair
Thanks for the comments .
I fitted that starter motor today and a big difference . Not in the speed of turning the engine over which remains the same just the ease it does it continually . Lots of space to fit this even able to keep one of the heat shields.
I must say noise of the Holset turbo is quite impressive if not a bit scary . Should be a mighty engine .
- Attachments
-
- IMG_1096-640x480.JPG (33.23 KiB) Viewed 16986 times
-
pauly
- Posts: 1892
- Joined: Sun Feb 24, 2008 7:16 pm
- TIPEC membership: 0
- Location: UK
Re: 944 S2 Repair
Hello Simon, looks like you're using 2 lambda sensors, is one for Vems and the other for a separate AFR gauge?
-
sgl1966
- Posts: 533
- Joined: Wed Apr 18, 2012 8:26 am
- TIPEC membership: 0
Re: 944 S2 Repair
Hi pauly , yes one for vems and one for the vems round gauge for AFR and EGT's .
You can see these on Vems Display but the round gauge was already fitted and a bit more discreet as well as allowing you to cross check numbers .
You can see these on Vems Display but the round gauge was already fitted and a bit more discreet as well as allowing you to cross check numbers .
-
pauly
- Posts: 1892
- Joined: Sun Feb 24, 2008 7:16 pm
- TIPEC membership: 0
- Location: UK
Re: 944 S2 Repair
Hi Simon, reckon I'll keep my innovate AFR gauge too. Did you make the distributor blanking plate or buy that in?
-
sgl1966
- Posts: 533
- Joined: Wed Apr 18, 2012 8:26 am
- TIPEC membership: 0
Re: 944 S2 Repair
Pauly I had the plate water cut .
Had an oil pressure issue which I knew had to be fixed but the thought of what was involved is depressing when you have just got it all together .
After discovering the low oil pressure and unable to remove the geared drive from the oil pump I knew the front of the engine had to come apart . Bought one of these engine support beams from machine mart which holds the engine nicely from the engine mounts allowing the the suspension, steering rack and sump to be removed .
I did not remove the crossover just dropped the sump to allow the oil pump to be removed . This showed the reason for the low oil pressure . The teeth on the internal drive are all rounded and the gaps in between enlarged . This was a brand new oil pump internal part when installed and can only guess the teeth were not engaged properly when the bolt was cranked up( yes bolt done up to correct torque) allowing them to slip . I bought a new drive gear from Porsche which has changed in design for the better . The teeth are engaged or not with no room for a cock up.
Still all back together apart from the belts to do , just getting it ready to send of for paint in three weeks time .
- Attachments
-
- IMG_1190-640x480.JPG (43.53 KiB) Viewed 16751 times
-
- IMG_1189-640x480.JPG (54.66 KiB) Viewed 16751 times
-
- IMG_1188-640x480.JPG (48.52 KiB) Viewed 16751 times
-
- IMG_1187-640x480.JPG (27.9 KiB) Viewed 16751 times
-
- IMG_1186-640x480.JPG (37.49 KiB) Viewed 16751 times
-
pauly
- Posts: 1892
- Joined: Sun Feb 24, 2008 7:16 pm
- TIPEC membership: 0
- Location: UK
Re: 944 S2 Repair
Hello Simon,
Have you thought about knocking up a 3 piece X member, like Lindsey sell?
Have you thought about knocking up a 3 piece X member, like Lindsey sell?
-
sgl1966
- Posts: 533
- Joined: Wed Apr 18, 2012 8:26 am
- TIPEC membership: 0
Re: 944 S2 Repair
Yes Pauly , after the second time doing this . It looks like the pump was not the cause .
After bolting it all back together still no oil pressure . This surely meant it was either the pick up tube , possibly blown a hole in it when welding to strengthen it or poor seal with the Loctite on the crank cradle . So out it all came again, this time taking crossover out to drop sump.
All looked good when we took it of but swapped out pick up tube with another just in case and also replaced pick up tube seal . I must say the seal provided in the VH gasket sets seems to give a much better seal than the Porsche seal when compared together. Put the sump back on and turned it over on the starter and nothing ! Took out oprv , nothing ! Removed filter, back filled it and turned it over , not even an air bubble. Ran out of ideas by now thinking the engine has to come out but then had a look at another engine in the back of the garage and realised what the problem was .
I sent the block out to be cleaned before building which meant removing the core plugs to clean the oil galleys which they replaced on the front and back of block . Unfortunatly there is a third one inside the block in the oil galley prior to pump they had not replaced and I had failed to notice when building it which meant there was a 16mm hole sucking in air when trying to prime the engine . This plug is not even shown in the PET diagrams or shown on any of porsche systems . Still at a cost of £1.56 for a core plug and t2 days lying on my back on a concrete floor , all fixed .Turning itover on the starter is showing us 50+psi .
Wont forget to check that again in a hurry.
- Attachments
-
- IMG_1210-640x480.JPG (41.91 KiB) Viewed 16556 times
-
pauly
- Posts: 1892
- Joined: Sun Feb 24, 2008 7:16 pm
- TIPEC membership: 0
- Location: UK
Re: 944 S2 Repair
I reckon you can over think things, I'd be twitchy about removing oil gallery bungs, and even core plugs. I've considered if I should rebore my 2.7 block, it's not scored and less than 0.002" out of round. It had good compression, so perhaps just a flash with the pads and paste would be enough.
-
sgl1966
- Posts: 533
- Joined: Wed Apr 18, 2012 8:26 am
- TIPEC membership: 0
Re: 944 S2 Repair
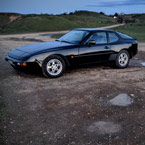
A happy new year to all .
While the road car is in for paint been spending some time tidying up the track car . Removed the battery tray to get to some surface rust which is a pain in the arse to get to and have had to do it to both cars . I find a flexible wand on the dremmel and a steady hand to cut the welds, soon has it out to get to the neglected area . Once cleaned and painted I find the 3m adhesives very good for putting the shelf back in.
Also having to find a way to attach the front lens covers again . Tigerseal has not held them in place but I think the paint is coming away from the border of the cover rather than the tigerseal not sticking to the lens. Going to cut down some small brackets and rivet them in place . Either that or the duck tape is coming out the box !
- Attachments
-
- ResizerImage587X782.jpg (131.59 KiB) Viewed 16219 times
-
- ResizerImage563X750.jpg (190.85 KiB) Viewed 16219 times
-
- ResizerImage1011X758.jpg (117.26 KiB) Viewed 16219 times
-
- headlights.jpg (150.13 KiB) Viewed 16219 times
-
sgl1966
- Posts: 533
- Joined: Wed Apr 18, 2012 8:26 am
- TIPEC membership: 0
Re: 944 S2 Repair
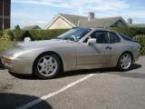
Called in paint shop today and car is looking great .Should be back next week.
As always with most 944's , what should have been a little freshen up with the paint turned into a complete screen out bare metal respray. Although the sills were excellent unusally , had to replace both re arch sections behind wheels , glass boot pin holes and bottem of one wing . Fortunatly had enough repair sections from dead cars to make the task easier .
As always with most 944's , what should have been a little freshen up with the paint turned into a complete screen out bare metal respray. Although the sills were excellent unusally , had to replace both re arch sections behind wheels , glass boot pin holes and bottem of one wing . Fortunatly had enough repair sections from dead cars to make the task easier .
- Attachments
-
- ResizerImage979X734.jpg (108.61 KiB) Viewed 16012 times
-
- paint2.jpg (115.2 KiB) Viewed 16012 times
-
- paint 3.jpg (91.83 KiB) Viewed 16012 times
-
Waylander
- Posts: 2736
- Joined: Tue Nov 19, 2013 10:48 am
- TIPEC membership: 0
- Location: West Essex
Re: 944 S2 Repair
Now that’s getting there, really nice
1992 968 Coupe Cobalt Blue
1985 Honda VF1000 F2 Bol D'or In Silver
2013 A4 177 TDI Quattro Ibis White
2013 Volvo XC60 D5 brilliant car
1985 Honda VF1000 F2 Bol D'or In Silver
2013 A4 177 TDI Quattro Ibis White
2013 Volvo XC60 D5 brilliant car